React App for GitHub Repositories
404 Page, Error Boundary & SEO Implementation

I am building my stance in the Tech space, both technically and creatively.
I picked this project from one of the 4 AltSchool Africa Second Semester Exam questions. It involved the use of APIs and I was very eager to get familiar with APIs. This article would provide a little insight into my building process, though it was 2 months ago, I'll make it as detailed as possible. It will also serve as a means of documentation.
Let’s get to React-ing!
Basic Setup and App Structure
I had React setup on my local machine already, so I started up by installing React Router which is a React library. The project required the use of React routes and nested routes for the various pages. To install:
Run the command:
npm install react router-dom@6
After it was successfully installed I imported Browser Router from react-router-dom in my index.js file.
import { BrowserRouter } from "react-router-dom"
And wrapped <App /> with <BrowserRouter></BrowserRouter>
In my App.js file, I imported Routes and Route from react-router-dom this was done to enable navigation through the various pages I was about to create.
import { Routes, Route } from "react-router-dom";
In my App component, my various Route components were wrapped in my Routes tag. Where I had paths to my Home Page, Repository List Page, Repository Details page, and 404 Page.
<Routes>
    <Route path='/' element={<Home />} />
    <Route path='/repositoryList' element={<Repository />} >
    <Route index element={<RepositoryList />} />
    <Route path={`repositoryDetails/:name`} element={<RepositoryDetails />} />
    </Route>
    <Route path="*" element={<NotFound />} />
  </Routes>
This was the foundation of my various components/pages. I started with my Home Page in the App.js file and styled it. Then the work started with my Repository List page. For this, I created a file called Repository which had nested routes that led to the Repository List page and Repository Details page. This can be seen in the code above. To access these pages Outlet was Imported in the Repository file.
import { Outlet } from 'react-router-dom'
const Repository = () => {
  return (
    <Outlet />
  )
}

export default Repository
For the repository list, I used the GitHub API for repositories https://api.github.com/users/USERNAME/repos whereby your GitHub username replaces the USERNAME in the API link. When that is done, it provides various data you can access related to your repositories. For the fetching of the data, I used Async and Await functions along with the installation of Axios, a HTTP library.
Within the Repository List file, was the rendering of a component called MyRepos. This component contains the markup and arrangement of how the repository data would appear. The use of pagination was implemented, importation of Outlet and the link to my Repository Details page was present.
The Repository Details file contained another API fetch but with access to the information of a specific repository. This was done with the importation of the useParams hook.
import { useParams } from "react-router-dom";
Once all pages were functional, the styling was done to each page making them responsive with good UI and web accessibility. The implementation of the 404 page was next.
404 Page
A 404 page refers to a "Not Found" page. It is created in the instance of the user going to a non-existing page in the URL. Instead of the page ending up blank and leaving the user confused, a page is built and designed to direct you back to the home page or your previous page, creating a fallback UI. In React the path to a 404 page is "*".
<Route path="*" element={<NotFound />} />
The NotFound page is a component that is styled and renders what the user would see when a non-existing page is accessed.
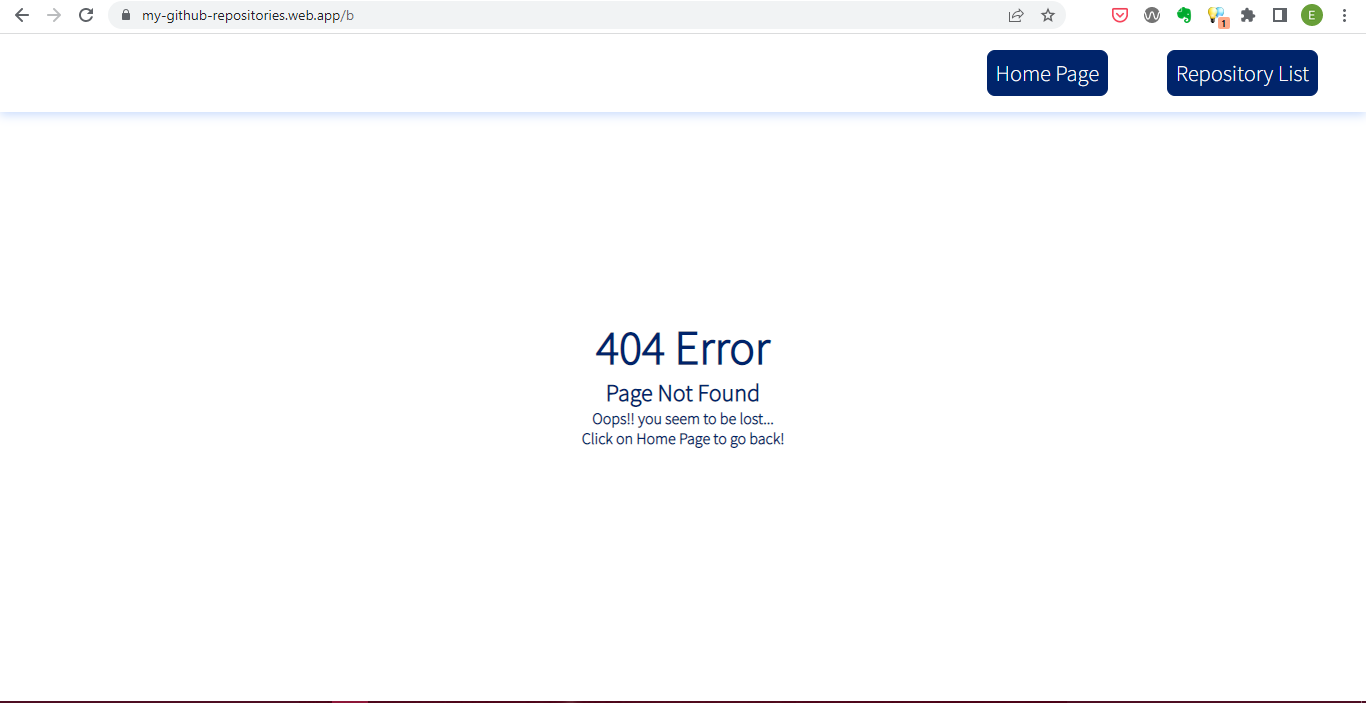
As you can see this page is tested with the use of /b in the URL address, which leads to no page, this is because none of the pages have that path.
Error Boundary
Error boundaries are React components that catch JavaScript errors and display a fallback UI instead of crashing the component tree. My Error Boundary component wrapped the Routes within the App component.
function App(){
return(
  <section className='main-container'>
   <ErrorBoundary>
  <Routes>
    <Route path='/' element={<Home />} />
    <Route path='/repositoryList' element={<Repository />} >
    <Route index element={<RepositoryList />} />
    <Route path={`repositoryDetails/:name`} element={<RepositoryDetails />} />
    </Route>
    <Route path="*" element={<NotFound />} />
  </Routes>
  </ErrorBoundary>
  </section>
)

}
export default App;
SEO Implementation
What is SEO? It stands for "Search Engine Optimization". Proper SEO helps search engines understand your application and its pages. With SEO your application is provided with access to higher visibility, on search.
This was done last, with the help of a video from Tech Base.
It involved the installation of React Helmet Async which is a library that allows you to control your document head and update meta tags.
To Install, run the command:
npm i react-helmet-async
After the installation, in the index.js file,
import { HelmetProvider } from 'react-helmet-async';
wrap the <App /> component in <HelmetProvider></HelmetProvider>.
  <HelmetProvider>
   <App />
    </HelmetProvider>
Navigate to your index.html file and in the meta tag, add data-rh="true" .
<meta name="description" content="Web site created using create-react-app" data-rh="true" />
After that go to each page created (in this case: MyRepos, RepositoryDetails and HomePage ) and import Helmet.
import { Helmet } from "react-helmet-async";
This enables the use of the <Helmet></Helmet> tag like so:
 <Helmet>
<title>Home Page</title>
  <meta name='description' content='Welcome to my Github repository Application with the use of React Routers' />
<link rel='canonical' href='/' />
</Helmet>
The content in the title tag and the value of the content attribute can be modified, as well as the value in the href attribute, which is based on the path of the page.
When this is done the use of Meta SEO Inspector Extension from Chrome can be used to evaluate each page and provide an SEO check.
SEO implementation was the final step; take a look at the final product!

Project Link: https://my-github-repositories.web.app/
My application was deployed using Firebase. I chose Firebase because the process was straightforward forward and it allows updates and adjustments to your application with the same live URL.
I hope this provided a little insight into the behind-the-scenes of my project. I would have loved to provide more information about each stage, but this was a time-bound article, hence the highlighting of some parts.
Kindly comment and share if you came across anything new and found some information resourceful!


